Thursday, August 28, 2008

I've been busy getting ready for the Labor Day weekend. It's a family tradition to get together and take in the festivities at Boxcar Days, our town celebration. My grandkids look forard to the carnival rides. The parade is the highlight on Monday. So I've spent most of my spare time this week cleaning my house.

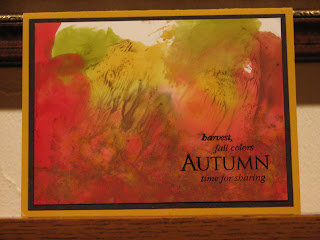
Any time that I've had for stamping has been devoted to working on a couple designs for the workshop. Of course, I can't show you those cards! It's a surprise until the workshop on September 20th. Since I haven't anything to show you, here's another card from Kathy. She used alcohol inks on glossy paper to create the colorful background. Aren't the colors beautiful? The verse is a stamp from Hero Arts.


Enjoy the Labor Day weekend!

Tuesday, August 26, 2008

Welcome guest artist Kathy Nyquist!

Kathy is my sister who went to CHA with me. If you're a regular follower of this blog, you'll recall a photo of Kathy, Tim Holtz & myself back in July. She loves to create with rubber stamps & lots of other "stuff"! In the past year she hasn't stamped much so I've been trying to encourage her to get back into it. I suggested that she make a card for the blog. She took the challenge. Yesterday, I received 7 emails with card photos! How fun to see all her creations. Watch for more of her cards in the next few weeks.


I love the simple beauty of this card. Kathy used one of the new holiday Cuttlebug embossing folders to emboss the front. She said the paper has a pearlescent finish. I imagine it's much prettier than the photo shows. The red on the berries was done with Ranger Stickles Christmas Red. Some of the holly leaves were covered with glue from a glue pen & sprinkled with crystal glitter. The verse came from a new small clear set from Hero Arts. The addition of a glittery red ribbon finishes off the card beautifully.

Thanks, Kathy, for this wonderful card!

Saturday, August 23, 2008

More Embossed Copper

Answer to a question about the copper used on the embossed bird & grass card:

I used copper foil tape on a piece of card stock. Copper tape is not easy to find. I searched on Ebay to find it. The same results can be achieved by using copper craft foil which is easier to find. Fond Memories sells packages of assorted color foils. I would suggest using a Xyron to apply adhesive to it, stick it to a piece of cardstock & then emboss it. Trim it to size before embossing. Cutting the embossed areas afterwards will flatten the design.

Another option is to use a piece of 36 ga copper sheeting. Fond Memories sells sheets of it that are about 8.5 x 11. It's also available in craft stores on rolls. I thought I should try a piece before I suggested it to anyone else. I cut it to size, easily done with a scissor. Just don't use your best one as it will eventually dull the blades. (Tip: I use a $ store scissor exclusively for metal. It works great!) I positioned it in the Cuttlebug embossing folder. It was so easy to see through the folder to align the copper to emboss the part of the image that I wanted. I don't have the Cuttlebug so I used my Wizard by Spellbinders to emboss it. I believe the results will be the same in the Cuttlebug. It embossed beautifully!

I did heat the copper to get the different colors. My heat gun is quite hot so I used it to heat the the copper. As it heats, it changes colors going from gold to pink to blue to silver & back again. It took a long time to get it to change colors. I suggest a torch for quicker results. Put the copper on a ceramic tile or hold it with a tweezer or pliers as it gets very hot.

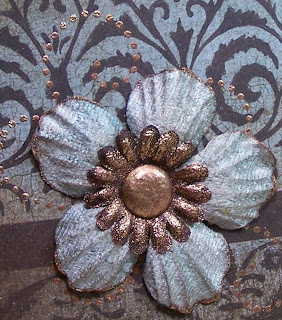
I painted it with black acrylic, allowed it dry slightly & then buffed the paint off the raised portions with a paper towel. I mounted it on black & then rusty red papers. The leaves pattern seemed made for the Graphic 45 paper! I used a Rust Adirondack marker to change the color of the gold brads to match the copper. This close up photo shows the colors of the copper -------}

If you have any questions, feel free to email me or leave a comment.
New Graphic 45 Paper

Check out these beautiful papers from Graphic 45! All are double sided card stock in wonderful vintage colors & patterns. The photos show a sampling of most of the papers in the Botanicabella Collection. I took 2 photos to show both sides. (The photos truly do not show the depth of the color on these papers.) The tags are all die cut on a 12 x 12 sheet and retail for just $1.50.....lots more included.
Just imagine what beautiful cards these papers will make........

Friday, August 22, 2008

Studio 490 blog

Check out the Studio 490 blog to see my Daisy card posted on Wendy's blog. I sent her the photo & she asked to post it. How COOL is that!

Embossed Copper card

Good Morning!

Here's a birthday card using one of the Cuttlebug Embossing folders. I embossed a strip of copper and used Ranger Paint Dabbers in Pool & Espresso to add the "patina" to the background. After it dried a little, I rubbed the raised image with a dry paper towel to buff the paint off. (Tip: Try to keep the copper on the embossing folder so it's supported while you buff the paint off. ) I used a damp Q-tip to remove any stubborn paint. The copper is matted on brown Bazzill paper. I embossed the card front also & placed the copper piece over the matching embossed area. I used one of the ribbon tags by Spellbinders to cut the birthday label. I trimmed off the ends of the tag where a ribbon could be threaded. It's mounted on the card using foam tape. The "happy birthday" verse is one of many in a set by Cornish Heritage Farms.

Thursday, August 21, 2008

Studio 490 Card

Here's a card that I made using one of the Studio 490 stamp sets that I talked about yesterday. I used the "Art by the Number" set. I love how it turned out! Here's a list of the supplies used:

Distress Peeled Paint


Versafine Black Onyx


Paper: white, red, yellow


Black ribbon


Crafter's Pick glue

First, I stamped the background on red cardstock & cut it out. I stamped the verse in the upper left corner & the swirl border along the right edge. I stamped the scalloped piece with Distress Peeled Paint on white paper. To make it dimensional on my card, I cut flaps on each side - see photo. I glued a narrow black ribbon to it & added a tiny bow. I folded the tabs along the stamped edge & used red line tape to fasten it to the red cardstock so that it to curved outward. I stamped the daisy in black ink 3 times on white paper & cut them out. I stamped it again 3 times on yellow paper & cut out just the center which I glued to each daisy. I stamped the leaves with Peeled Paint again 3 times & cut out 5 of the leaves. I used green florist stem wire for the daisy stems. I curled the end of the wire & fastened it to the back of each flower with red line tape. I added foam tape to mount the flowers. Crafter's Pick glue holds the stem ends in place in the "vase/pot" and the leaves are attached to the stems with it, too. It's mounted on a white card......a bit hard to see in the photo.


Wednesday, August 20, 2008

New stuff....

Look at these new stamps just in!

Wendy Vecchi created these wonderful new stamps which are made by Stampers Anonymous. I met Wendy at CHA when she was demoing at the Ranger booth. (That's me & Wendy in the photo with Tim Holtz behind us.)

She was so excited to have this line of stamps debuting at the show. She has 7 sets available. The photo of the other sets didn't turn out....too much reflection off the plastic. You'll have to take my word for it that these sets are truly unique. Each set has a large background stamp, a verse & other elements to complete the design. Wendy says it's simple to create with these sets by starting with the largest stamp & working to the smallest. Each stamp set comes with a color sampler of lots of Wendy's samples. Wendy uses Grungeboard for many of her flowers. She stamps them, colors them with Distress inks, cuts them out & curls the edges & then mounts them on her card or other project.
I played a little with the flower from the holiday set "Art of Making it Merry". First, I stamped several backgrounds from 3 stamp sets with black ink on white paper. I stamped the flowers several times on each of the different backgrounds. I cut out different parts of the flower & sprayed them with Vintage Pink Glimmer Mist. After I had stamped the background & flower, I sprayed it with Patina & Juniper Glimmer Mist. I put the flower together with foam taped to add dimension, added Ranger Stickles Black Diamond on the flower edges & dots near the swirls.

Lots of new Cuttlebug embossing folders have arrived! There are many new holiday folders including Halloween, Thanksgiving & Christmas. These folders are so easy to use. The images are beautiful just embossed. Chalks or inks can be rubbed over the images to make them stand out. I love to use these with metal craft foil. The colored foils can be sanded to reveal the silver base color (Tip: leave the foil on the raised side of the folder so that the design doesn't dent when sanding.) Try these folders with the new Core'dinations papers! These papers have a different core color than the face. Sand the raised image to reveal a coordinating color. We will use the Core'dinations paper at the Workshop.

Remember to register for the workshop. Just 30 days before the BIG day!


Thursday, August 14, 2008

Tip for using color sprays

Today, I'm going to share my technique for using any color spray mists. I often use Glimmer Mist by Tattered Angels for sparkle & color. I used Autumn Leaves on the sympathy card that I posted earlier this week. Another color spray made by Ranger is a textile spray in the Adirondack color line called Color Wash. These sprays are permanent on fabric. They're also wonderful to use on paper. You can also make your own custom color sprays using a mister bottle (I suggest the Mini Mister by Ranger), water, and dye ink from a re-inker (Ranger Distress or Adirondack refill inks work great). If you want metallic or pearlescent sparkle, just add a small amount of Perfect Pearls by Ranger. Perfect Pearls have a binder in them so they will stick to the paper when it's dry.

Now, for my tip to keep the spray contained. I use a dishpan that I found at a dollar store. I lay a sheet of printer paper or a paper towel in the bottom, place whatever I intend to mist on the paper & spray away. The dishpan keeps the spray from going all over as long as you keep the spray bottle near the rim of the pan. If I'm concerned about overspray, I lay down some newspaper & place the dishpan in the center. The paper in the bottom of the pan dries out between uses and becomes a great medley of color from all the different sprays that I use. I save the prettier scraps to use as background papers on some future project. If I'm spraying several things so that the paper gets wet, I either dry it with my heat gun or change the paper. Otherwise, the spray builds up and will soak the back of the item you're trying to spray. That's usually not a good effect!
I sprayed the flowers on the right side with Autumn Leaves Glimmer Mist. You can see the difference in the colors of the aqua flower. The spray dulled the color so it coordinated so much better with the Kimberly Poloson paper by Fiskars on the sympathy card. It's a bit harder to see the difference in the black flowers. The sprayed flower has a brown tone with a hint of sparkle.

Here's a closer look at the flowers. The misted flowers are on the left side in this photo.
Until next time, mist away!


Tuesday, August 12, 2008

Sunday visitors

In case you're wondering how my horseshoe game went Monday night, our team lost. Of course, I wanted to win but it's good to be done. I had a great first game scoring 17 ringers of 50 shoes pitched. I won. That has to be one of my all time high games. My average for tournament play was 8 ringers/50 shoes. It was fun! My second game was close to pathetic. I had only 5 ringers and couldn't seem to get close to the stake. My opponent threw twice her average. Needless to say, I lost that game.

We had some surprise visitors at our house on Sunday evening..... First this small speckled fawn wandered into the yard. He was enjoying all the mullberries that had fallen to the ground.

Then there were two.............

And finally three..........

I shot the photos through a window. We enjoyed watching them. They enjoyed the mullberries!

Saturday, August 9, 2008

Time to post

I've definitely been MIA. Why? Wow, it seems life has gotten in my way......work, laundry, yardwork, sleep (not enough), horsehoes. Horseshoes? you say. I play in a horseshoe league. It's just for fun. Well, it's supposed to be for fun. This year has been a struggle. I have't pitched very consistently. Anyway, last week was the start of our league tournament. That meant 2 nights of playing. It's double elimination & our team is 1 & 1 right now. We're hanging in there. On Wednesday night, I pitched against someone who generally ourscores me.....in other words he always wins when we play. I was trying to keep score in my mind but lost track. As we threw our last 2 shoes, I was sure I was was way behind in points. To my surprise, we tied. That meant a "throw off". We each threw 2 shoes twice. Whoever scored the most points would win. I pitched my shoes, one was against the stake. He pitched, one shoe was against the stake, one was very close......he scored 1 point. Now, he throws first & gets a shoe near the stake. The pressure mounts. My first throw goes way beyond the stake (typical for me this year). The 2nd pitch spins around the stake, a ringer! I win! I can still feel the elation of the moment!
Now for what's going on at Fond Memories. Kathy & Mary have been marking down lots of things for Crazy Days on August 16. One day when I was there for lunch, they had rubber stamps piled all over the floor while they rearranged some of the stamps. Other stamps were marked with a sticker to indicate 40% off. Lots of great stamps on sale! There will be lots of other great deals in all areas of the store. Add a note to your calendar: Go to Fond Memories for Crazy Days on August 16th!

We're still working on finalizing the card projects for the Workshop. We had a meeting last week to review our progress. Some projects are done, some are in the tweaking stage, and a couple are ideas waiting for stamps to arrive. We'll be making final designs soon so we can get all the supples ordered.
I did find time to make a couple cards over the past week. One was out of need......this sympathy card.
I used paper by Kimberly Poloson from Fiskars. I love the colors. I used Tattered Angels Autumn Leaves spray around the edges of the card. I also sprayed the flower to tone down it's original color. I pressed the little brown flower onto the Versamark pad & then into Ancient Tarnished Gold embossing powder by Ranger to add the gold highlights. I also embossed the brad & flower petal edges.
The 2nd card uses some new stamps by Paper Bag Studios. I love this little girl. Her expression is so captivating.
I stamped the image on Eclipse paper & tore the edges to make a mask. I stamped the girl on white paper in black ink. I applied the mask over her face. Then I stamped the background using the tile & alpabet stamps shown plus one other stamp not in the photo. I used Spellbinders Nestabilities to cut the oval & mat. The red paper is also stamped with the same stamps.
Happy Stamping!

Friday, August 1, 2008

August 1st already..........wow

Hi, everybody! I can hardly believe it's August already. I hate to think of what's just around the corner.........school, fall, winter. I can't think of that yet. I love fall but I want to enjoy the warm summer weather for now. It's crazy how fast July seemed to zip past. August also means the Workshop is just over a month away! Have you signed up yet? We're working on some great card projects. Put it on your calendar - September 20th.

Do you have any of the Spellbinders Nestabilities dies yet? I love these nesting sizes of various shapes of dies. It's so easy to cut a circle & a mat or two with different sizes. The scalloped edge shapes are so fun. If you have't added any of these to your supplies, be sure to check out the selection at Fond Memories. All the current Nestabilities are in stock now. A few new dies have been added, too. One is a set of leaves. This would be great for a fall card or scrapbook page accent. Another set called Symbology 1 has 4 shapes including a flourish. I saw some nice card samples using these designs at CHA so I had to order it. The die is one of the all time best sellers.

Some of the new Cuttlebug embossing folders came in today. There are some really unique new patterns. One that I like is tall grass with a bird. Some of the sets include a cutting die with various words & word phrases to be used with the embossed image: emboss the card, die cut a phrase, put them together for a quick card or add some stamping or chalking for a more involved card design. Lots of possibilities.....

I hope you get a chance to create this weekend......